Tradingview - FX currency information in CXO Reports
Introduction
This article will take you through the steps of creating a sample FX information web view portlet, using a free format report within a CXO Report.
To summarize the process to achieve this end result, below is a summarized version of the steps:
- Creating a HTML file to include the details of the stock tickers
- Creating a Free-Format Report using a Web View Control
- Upload the HTML file to the CXO-Cockpit Application Server

Creating a HTML file to include the details of the stock tickers
- Launch Notepad or any text editor on your computer.
- Paste the following HTML code into Notepad:
<!-- TradingView Widget BEGIN -->
<div class="tradingview-widget-container">
<div class="tradingview-widget-container__widget"></div>
<div class="tradingview-widget-copyright"><a href="https://www.tradingview.com" rel="noopener" target="_blank"><span class="blue-text">Quotes</span></a> by TradingView</div>
<script type="text/javascript" src="https://s3.tradingview.com/external-embedding/embed-widget-tickers.js" async>
{
"symbols": [
{
"title": "EUR/USD",
"proName": "FX_IDC:EURUSD"
},
{
"description": "GBP/USD",
"proName": "FX:GBPUSD"
},
{
"description": "USD/JPY",
"proName": "FX:USDJPY"
},
{
"description": "CAD/USD",
"proName": "FX_IDC:CADUSD"
},
{
"description": "CHF/USD",
"proName": "FX_IDC:CHFUSD"
}
],
"locale": "en"
}
</script>
</div>
<!-- TradingView Widget END --> - Save the following document on your computer, by clicking File → Save As → with the following file format: "file_name.html"
Creating a Free-Format Report using a Web View Control
- Log into CXO and access the CXO-Designer to build a new "Free Format Report"
- From the controls on the right, please select the "Add Control" followed by "Web View"
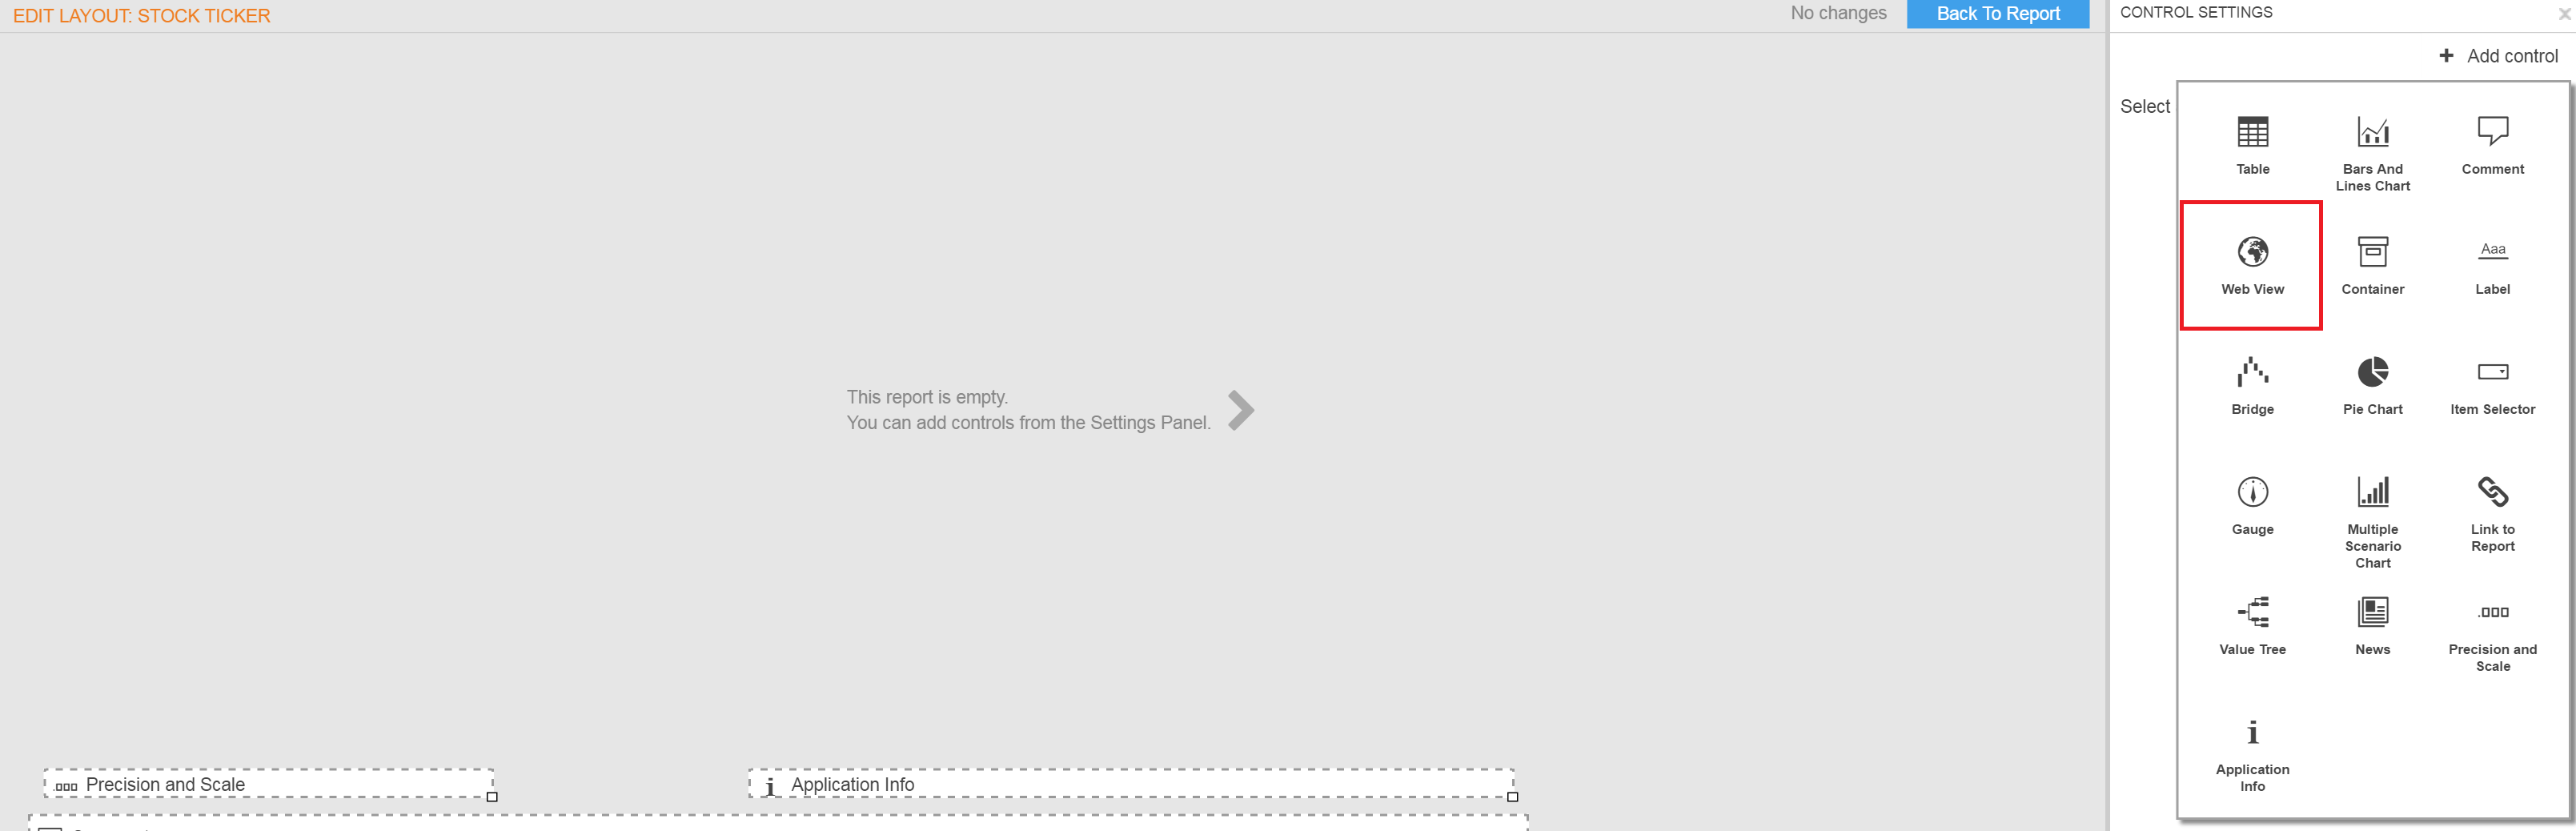
- Please arrange the "Web View" portlet to size as needed
- Save and Exit
Upload the HTML file to the CXO-Cockpit Application Server
- In the report settings, you will now see a section called "Web View". Please expand this selection

- Deselect the checkbox that reads "Hide URL Bar"
- Since URL is a required field, please use a dummy URL at this point. I added http://google.com but this could be your company URL.
- Once a valid URL is added the report preview will allow you to select the button called "Upload a file"
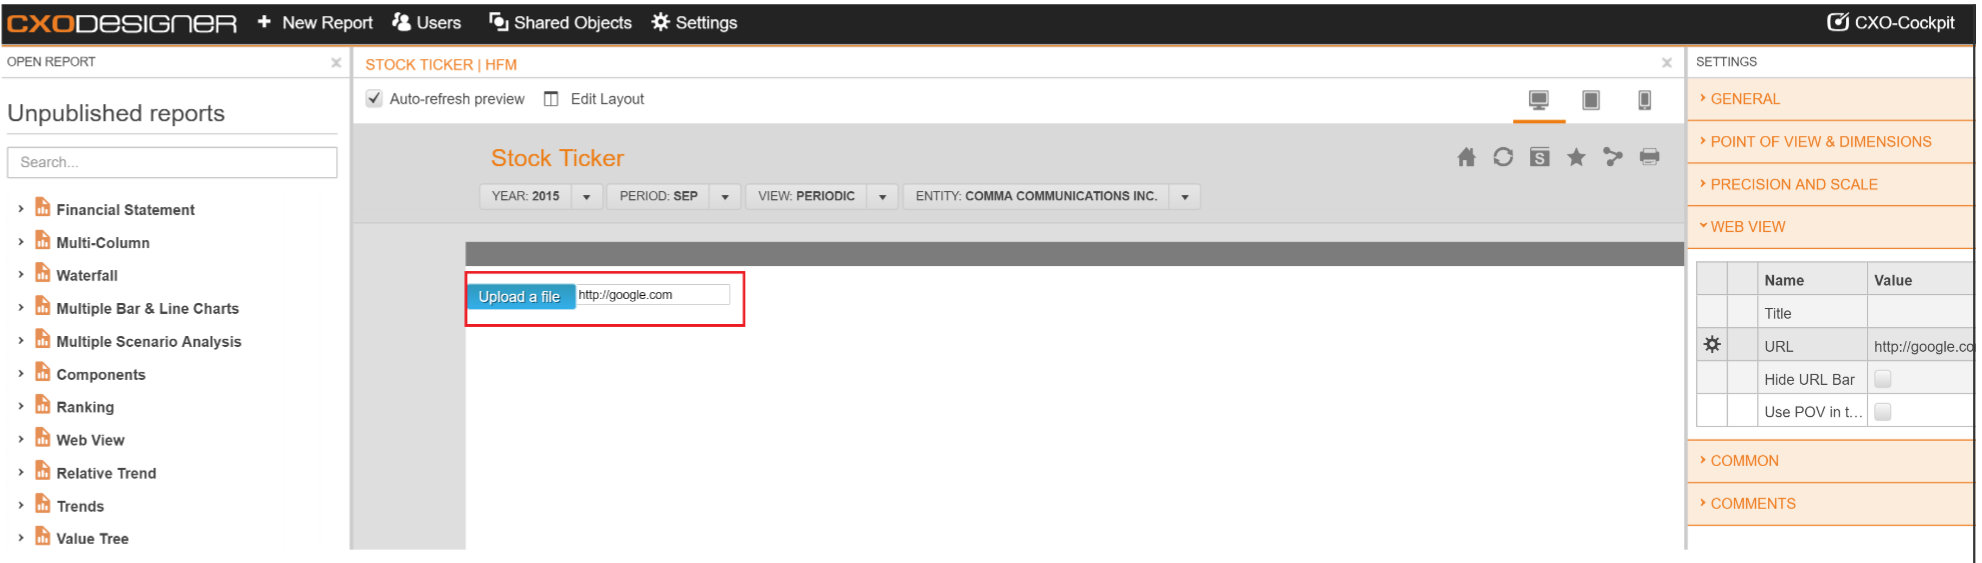
- Click on "Upload a File", followed by selecting the "file_name.html" of the html document you created in Step 1
- Once the file has been uploaded to the CXO server, it will automatically generate a URL like "Uploads/...."

- Please copy the generted URL from upload field, and paste it in the Web View settings for the property "URL". This wil replace "http://google.com"
- Select the checkbox called "Hide URL Bar"
- Your report will provide you with live FX currency information